Your RV is more than just a vehicle. It is your home on wheels. Keeping it in great shape requires regular care, especially when it comes to the plumbing system. One of the most important steps you can take is using a motorhome winterizing kit every year. This process protects your pipes, tanks, and fixtures from freeze damage and keeps everything flowing smoothly season after season.
In this article, you will learn exactly how to maintain your RV plumbing with a motorhome winterizing kit. We will walk through each step in simple terms so that even first-time RV owners can follow along with confidence.
Why Annual RV Plumbing Maintenance Matters
Many RV owners overlook their plumbing until something goes wrong. However, waiting for a problem to appear is a costly mistake. Water that sits inside pipes during freezing temperatures can expand and crack your lines. A single burst pipe can lead to hundreds or even thousands of dollars in repairs.
Annual maintenance, therefore, does two things. First, it prevents expensive damage. Second, it extends the life of your entire plumbing system. Using a motorhome winterizing kit as part of this routine makes the process easier and more effective.
Additionally, regular maintenance helps you catch small issues early. A slow leak or a worn valve is much cheaper to fix before it becomes a bigger problem.
Understanding What Comes in a Motorhome Winterizing Kit
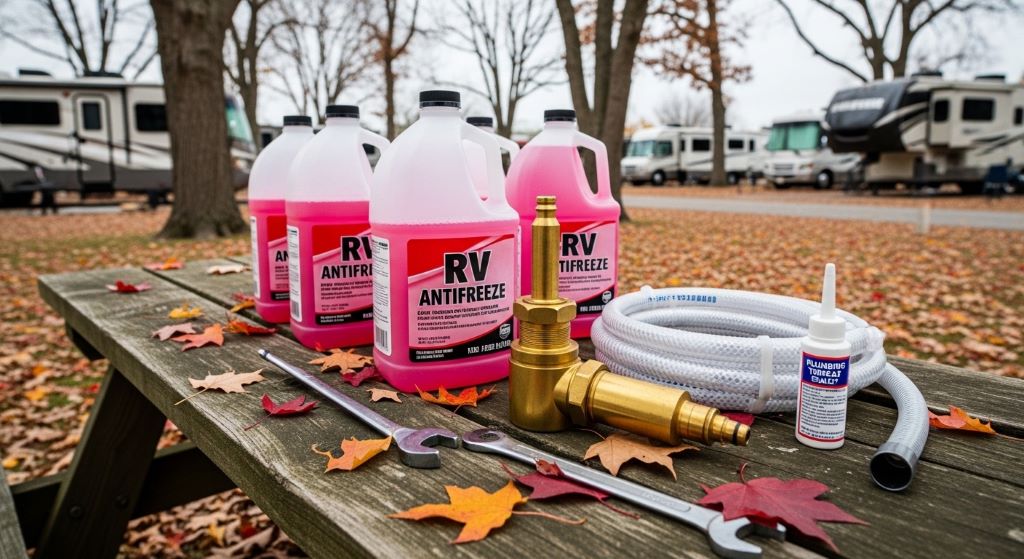
Before you get started, it helps to know what tools and supplies you are working with. A typical motorhome winterizing kit includes several key items.
Most kits contain RV antifreeze, which is a non-toxic pink fluid designed specifically for potable water systems. This is different from automotive antifreeze, which is toxic and should never be used in an RV water system.
Kits also often include a water pump converter kit. This small attachment allows you to draw antifreeze directly from a jug using your RV’s own water pump. Additionally, you may find blow-out plugs for using compressed air, hand pump sprayers, and basic fittings.
Some premium kits also come with a checklist or instruction guide. This is useful if you are new to the process.
Getting Your RV Ready Before You Start
Preparation is everything. Before you open your winterizing kit, you need to get your RV’s plumbing system ready. Skipping this step can make the process less effective.
Start by turning off your water heater. Let it cool completely before you do anything else. Working on a hot water heater is dangerous and can cause burns.
Next, drain your fresh water tank completely. Open all faucets, both hot and cold, and let the water run out. Do not forget your outdoor shower, toilet, and any low-point drains. These are usually located under the RV and are labeled with a tag or color.
After that, drain your gray and black water tanks at a proper dump station. Flush both tanks thoroughly. This step removes waste and reduces the chance of odors developing over the winter months.
Once everything is drained, close all faucets and valves. You are now ready to begin the winterizing process.
How to Use Antifreeze to Protect Your Pipes
This is the most important part of the process. Using RV antifreeze correctly ensures every part of your plumbing system is protected.
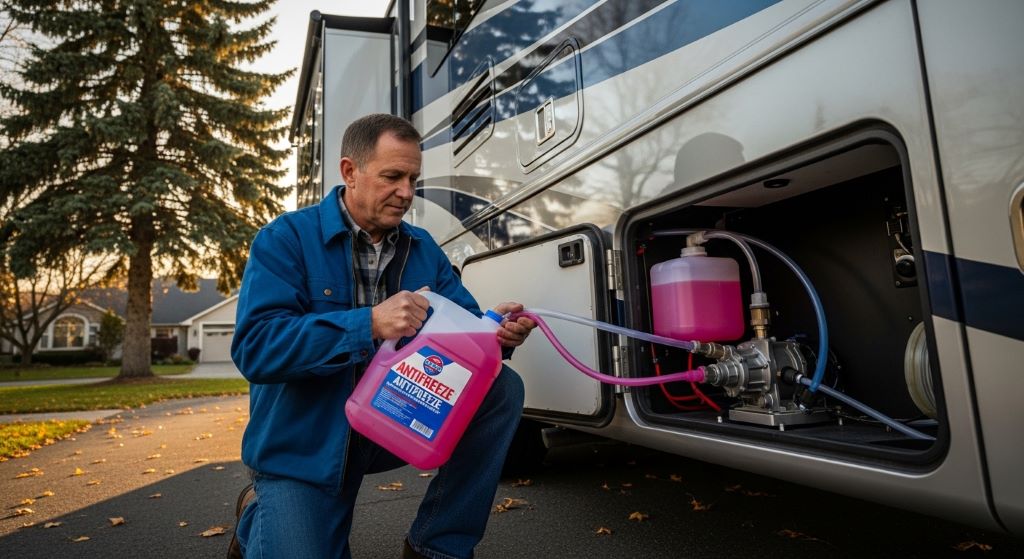
First, install the water pump converter kit. This usually involves bypassing the water heater so you do not waste antifreeze filling that large tank. Most RVs have a bypass valve for this purpose. If yours does not, you can install one easily with a simple kit from any RV supply store.
Next, connect the converter tubing to your fresh water pump and place the other end into your jug of RV antifreeze. Turn on the water pump. It will begin pulling antifreeze through your system.
Then, go to each faucet one at a time. Start with the faucet furthest from the pump. Turn on the hot side first and wait until you see pink antifreeze flowing from the tap. Then switch to the cold side and do the same. Repeat this for every faucet in the RV, including the kitchen sink, bathroom sink, and shower.
After all faucets have been covered, flush the toilet until you see antifreeze in the bowl. This protects the toilet’s water seal. Additionally, pour a small amount of antifreeze directly into each drain. This protects the P-traps, which are the curved pipe sections under sinks that hold water.
Finally, check any exterior water lines, such as an outdoor kitchen or utility sink. These areas are often forgotten but are just as vulnerable to freezing.
Using Compressed Air as an Alternative Method
Some RV owners prefer to blow out their water lines with compressed air instead of using antifreeze. This method works well, but it requires the right tools and technique.
You will need an air compressor and a blow-out plug that fits your RV’s city water connection. Set your compressor to no more than 50 PSI for plastic lines. Exceeding this pressure can damage fittings and seals.
Connect the blow-out plug to your city water inlet. Then, open each faucet one at a time and run the compressor until no more water sprays out. Work your way from the farthest point back toward the inlet.
However, keep in mind that this method may not remove every last drop of water. Therefore, many experienced RV owners combine both methods. They blow out the lines first and then run a small amount of antifreeze through the system as a backup measure.
Protecting Your Water Heater
Your water heater needs special attention during the winterizing process. Most RV water heaters have an anode rod inside the tank. This rod protects the tank from corrosion. Annually draining and inspecting this rod is a good habit.
To drain the water heater, locate the drain plug or anode rod access on the outside of the RV. Use the appropriate socket to remove it and allow all water to drain. If the anode rod looks corroded or is less than half its original size, it is time to replace it.
Once the tank is empty, leave the drain plug out over winter. This allows any residual moisture to escape. Additionally, check the pressure relief valve while you are at it. This valve is a safety device. If it is corroded or stuck, replace it before the next camping season.
Maintaining Seals, Valves, and Connections
The pipes themselves are not the only parts of your plumbing system that need care. Seals, valves, and connections also require attention during your annual maintenance.
Inspect all visible pipe connections under your sinks and behind access panels. Look for signs of moisture, rust stains, or mineral deposits. These can be early signs of a slow leak. Tighten any loose fittings gently. Do not over-tighten, as this can crack plastic fittings.
Check the condition of your black and gray tank valves. These are the pull handles near your dump connections. They should slide smoothly and seal completely. If a valve feels stiff or does not close fully, lubricate it or replace it before storing the RV.
Additionally, inspect the city water connection and the check valve inside it. This small spring-loaded valve prevents backflow. Over time, it can wear out and allow water to leak. Replacements are inexpensive and easy to install.
Checking Your Water Filter System
Many RVs come with inline water filters. These need to be maintained as part of your yearly routine. Leaving an old, wet filter in place during winter storage can lead to mold growth and contamination.
Remove all water filters before storing your RV. Discard disposable filter cartridges. If you have a reusable filter housing, wash it with warm soapy water and let it dry completely before reinstalling it in spring.
Some RV owners also add a UV water purifier or a whole-coach filtration system. These components have their own maintenance requirements. Refer to the manufacturer’s instructions for each one.
Spring Startup: Getting Your Plumbing Ready Again
Winterizing is only half the story. In spring, you need to flush your system before using it for drinking or cooking. This step is called de-winterizing.
Start by removing the water pump converter and reconnecting your fresh water tank. Fill the tank with clean water. Then, open every faucet and let the water run until the pink antifreeze color disappears completely. Flush the toilet several times as well.
Next, replace your water filters and reinstall the anode rod in the water heater. Refill and turn on the water heater. Check all connections for leaks after the system is pressurized. Additionally, test your water pump by switching from city water to tank water and back.
Once everything looks good, run your water for a few minutes before drinking it. Some people prefer to sanitize the fresh water tank with a diluted bleach solution each spring. This is a great habit and takes only a few extra minutes.
Conclusion
Maintaining your RV plumbing with a motorhome winterizing kit each year is one of the smartest things you can do as an RV owner. The process protects your pipes from freeze damage, extends the life of your fixtures and valves, and prevents costly repairs. By draining your tanks, running antifreeze through every faucet and fixture, protecting your water heater, and inspecting your seals and connections, you give your RV the care it deserves.
Additionally, a proper spring startup ensures your water system is clean and safe to use. When you approach this task with a clear routine each year, it becomes quick and straightforward. Therefore, make annual RV plumbing maintenance a non-negotiable part of your RV lifestyle. Your future self will thank you every time the water flows perfectly on your next adventure.
Frequently Asked Questions
How often should I use a motorhome winterizing kit on my RV?
You should winterize your RV once a year, ideally before temperatures in your storage area drop below 32°F (0°C). Even if you camp in winter, winterize whenever the RV will sit unused in freezing conditions for more than a day or two.
Is RV antifreeze safe for drinking water systems?
Yes. RV antifreeze that is labeled as non-toxic and propylene glycol-based is safe for potable water systems. However, you must always flush it out completely before using your water system for drinking or cooking in the spring.
Can I winterize my RV using compressed air alone without antifreeze?
You can use compressed air to blow out most of the water, but it rarely removes every drop. Therefore, combining the blow-out method with a small amount of RV antifreeze is the most reliable approach for complete freeze protection.
What happens if I forget to winterize my RV?
If water is left in your pipes during freezing temperatures, it can expand and crack the lines. This can result in burst pipes, damaged fittings, a cracked water pump, or a broken water heater. Repairs can cost anywhere from a few hundred to several thousand dollars.
How long does the winterizing process take for an average RV?
For most RVs, the full winterizing process takes between one and three hours. This includes draining the tanks, bypassing the water heater, running antifreeze through all fixtures, and inspecting connections. With practice, many owners complete it in under an hour.
Related Topics:
Why Is My Car Shaking When Braking Lightly at Low Speed
Auto Repair Financing vs Personal Loan Comparison